
Overview
The Remote control feature allows you to view and interact with one or more cloned apps directly from a web browser, without needing to physically touch the device. You can send taps, swipes, keyboard input and clipboard content to your clones in real time, monitor their screens as a live stream and perform management actions such as restarting apps or generating new identities, all from a single browser interface.
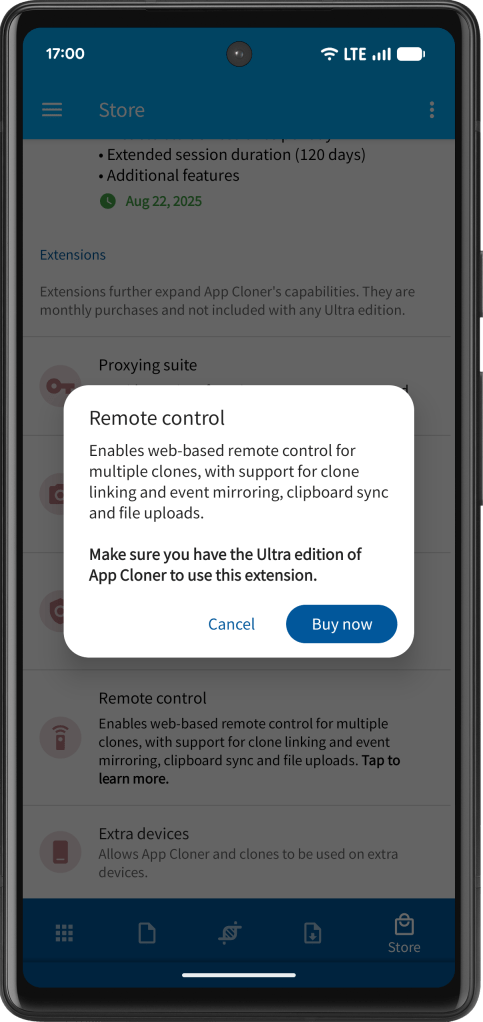
Remote control requires the Ultra edition of App Cloner and the Remote control extension. In addition, each clone you wish to control must have been created with the Automation option Remote control enabled at clone creation time; this option cannot be added retroactively to existing clones.
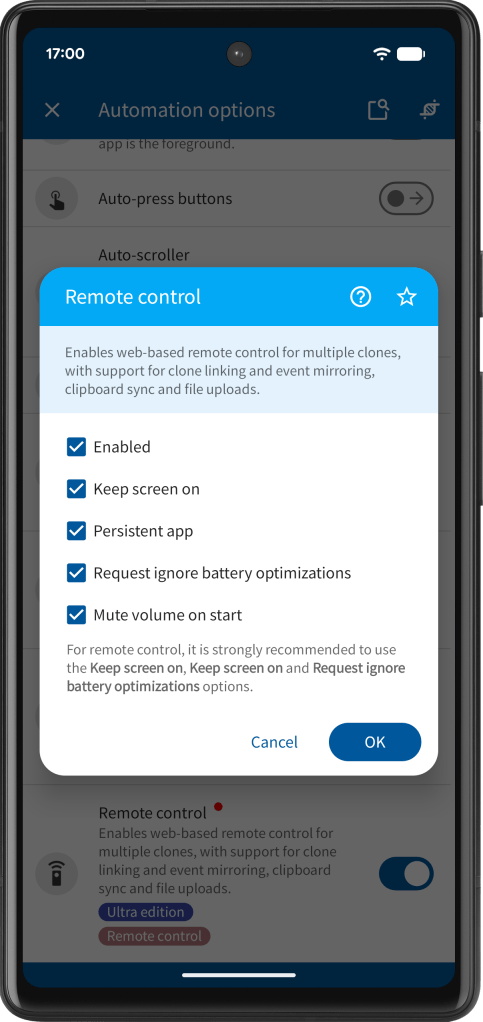
It is strongly recommended to enable Keep screen on and Persistent app. Ignoring battery optimizations is required for remote control to function, so ensure this option is enabled. When the clone starts, it will request unrestricted background usage if needed. Mute volume on start is useful if the clones play audio. All of these options are selected automatically when Remote control is enabled.
To start a remote control session, App Cloner must be installed and running on the device. The App Cloner HTTP server is used to serve the remote control interface and handle incoming events; it starts automatically when you access the Remote control feature.
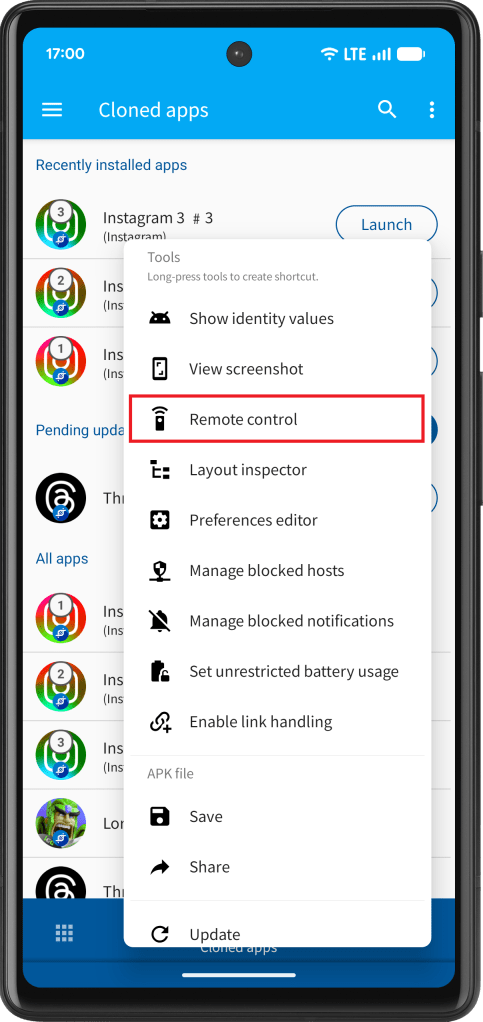
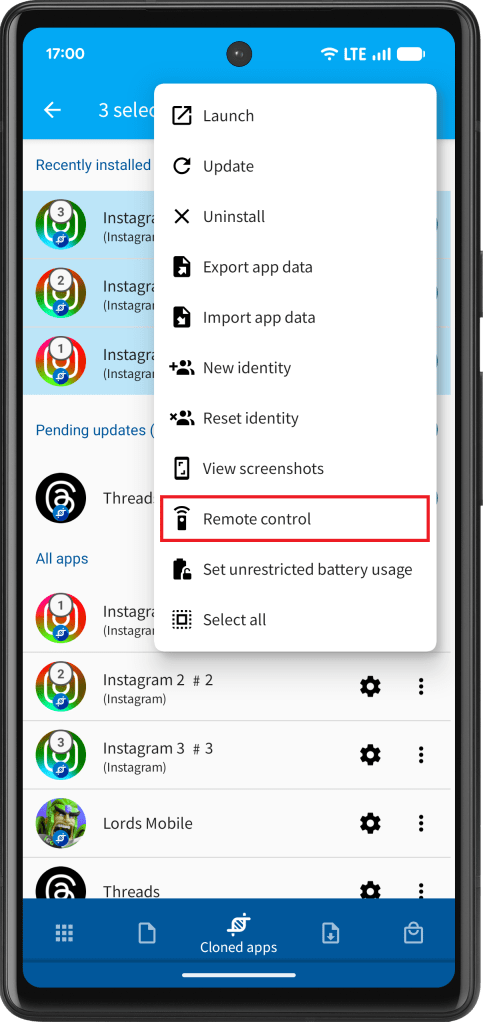
You can open a remote control session from the cloned apps screen by opening a clone’s pop-up menu or by multi-selecting several clones and using the context menu to open all of them together in a single session.
Remote control interface
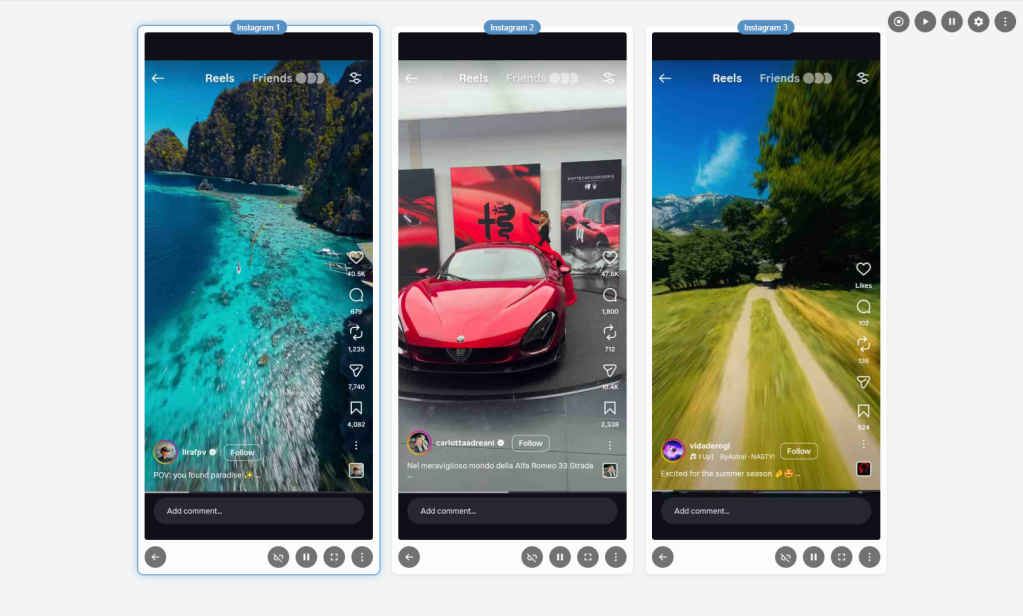
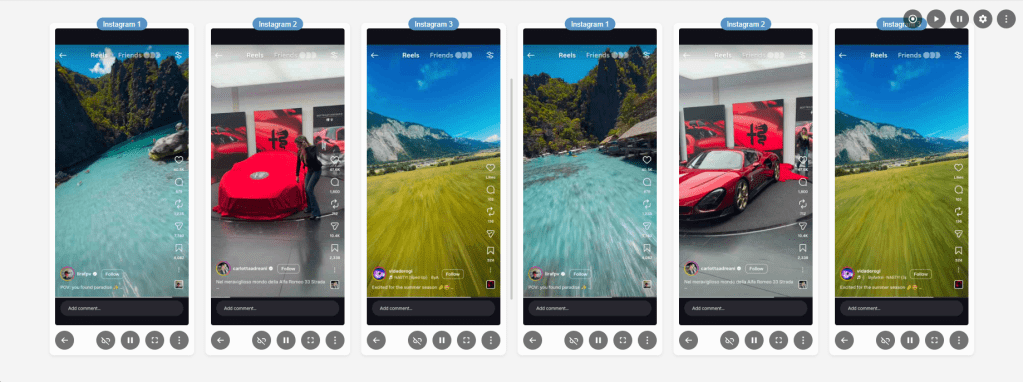
Once the Remote control page opens in your browser, each selected clone is displayed as a card in a gallery layout. Each card shows a live view of the clone’s screen, a label identifying the app at the top, and a row of controls along the bottom. You can have as many clone cards on screen simultaneously as you have clones running with remote control enabled. Please note that running more clones at the same time increases both bandwidth usage and CPU load on the device. For best performance, it is recommended that both the mobile device and your computer are connected to the same high-speed local Wi-Fi network.
Interacting with a clone is straightforward: move your mouse pointer over its screen to activate it. The mouse pointer position and movement is indicated by a small green dot on the clone’s screen. Then click, drag or scroll as you would on a touchscreen. Left-click corresponds to a tap or primary pointer action, right-click sends a secondary pointer action and scrolling the mouse wheel sends vertical scroll events to the app. Keyboard input is forwarded to whichever clone card your pointer is currently hovering over or has most recently interacted with. The clone’s soft keyboard is automatically hidden in remote control mode.
The active clone is highlighted with a subtle border glow so you always know which device is receiving your input.
Stream playback controls
Each clone card has a play / pause button in its footer that lets you pause the live stream for that individual clone. When paused, the live view freezes on the last received frame and stops consuming bandwidth, which is useful when you only need to monitor a subset of your clones at any given moment. Pressing play resumes the live stream immediately.
At the top of the page, two global buttons, Resume all and Pause all, apply the play or pause action to every clone at once. This is convenient when you want to conserve resources during a break or resume monitoring all clones simultaneously after a pause.
Display settings
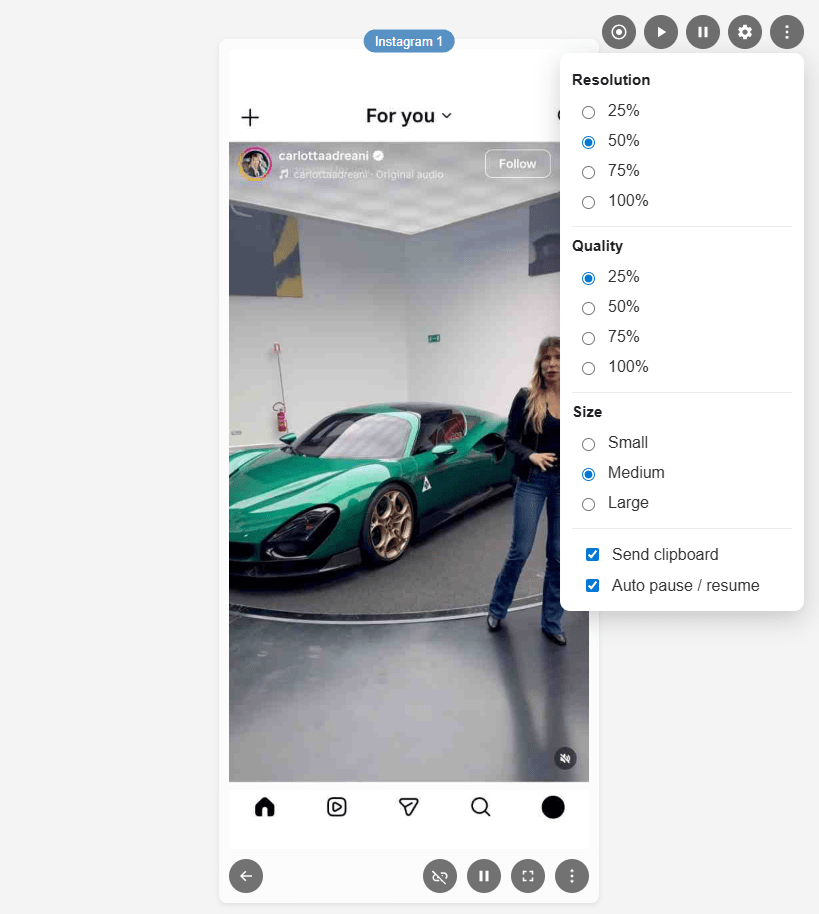
The settings menu, accessible via the gear icon in the top-right corner, gives you control over how screenshots are captured and displayed.
Resolution determines the scale at which each frame is captured on the device before being sent to the browser. A lower resolution reduces the amount of data transmitted per frame, resulting in faster refresh rates and lower bandwidth usage, at the cost of image sharpness. A higher resolution produces crisper images but increases the data per frame and may reduce streaming smoothness on slower connections.
Quality controls the JPEG compression level applied to each captured frame. Lower quality values produce smaller files and faster streaming, while higher quality values preserve more visual detail. In practice, tuning resolution and quality together lets you find a balance between image clarity and streaming speed that suits your connection.
Size sets the display width of each clone card in the gallery, giving you the choice between a compact, standard, or large layout depending on your screen size and how many clones you are monitoring simultaneously.
All settings are saved automatically to your browser’s local storage and are restored the next time you open the Remote control page.
Clipboard sync
The Send clipboard option in the settings menu enables one-way clipboard synchronization from your browser to the Android device. When this option is enabled and a clone is active, pressing Ctrl+V (or Cmd+V on macOS) will transmit the text currently on your computer’s clipboard directly to the focused clone, where it is injected as if it had been pasted on the device itself.
It is important to understand that clipboard sync is one-directional: it sends your browser’s clipboard to the device, but does not read or retrieve anything from the device’s clipboard back to your computer. This feature is particularly useful for pasting URLs, login credentials or other text content into apps running on your clones without having to type them manually.
Auto pause / resume
The Auto pause / resume option in the settings menu, enabled by default, automatically manages stream playback whenever the browser window loses or regains focus.
When the browser window is minimized, moved to the background or the tab loses focus, any clones that are currently streaming are paused automatically. When you return to the window or tab, those same clones resume streaming exactly as they were before.
This behavior respects any pauses you have set manually. Only clones that were actively streaming at the moment the window lost focus are paused and later resumed. Clones you had already paused yourself remain paused when you return.
Global actions
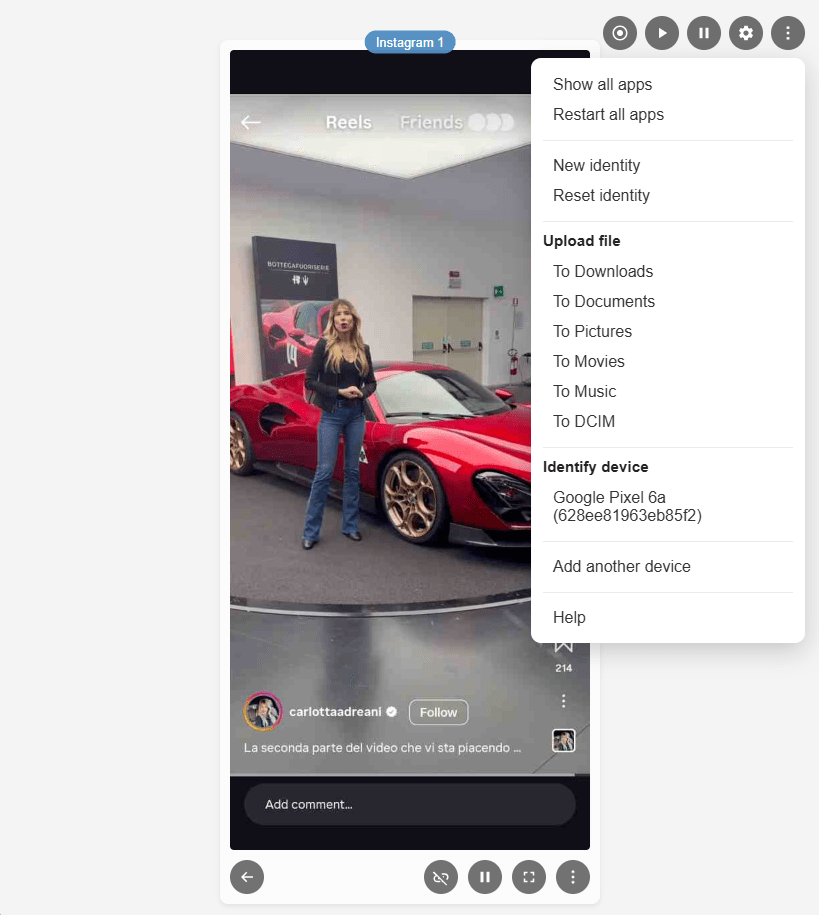
The global ⋮ menu at the top of the page provides actions that apply across all clones in the current session. Bring to foreground (all apps) brings every clone to the foreground in sequence. Restart (all apps) restarts every clone in sequence.
When the session contains more than one clone, both actions show a dialog asking for the delay in milliseconds to wait between each app. Set this long enough for each clone to fully show its user interface before the next one starts; this is required for remote control to be fully operational.
If any clones support identity management, New identity (all apps) and Reset identity (all apps) apply the corresponding identity action to all eligible clones in sequence. As with the other bulk actions, when more than one eligible clone is present a dialog asks for the delay in milliseconds to wait between each app.
The Identify device section lists every connected device by name. Selecting an entry triggers a visual and audible signal on that specific device, which is useful for confirming which physical device a particular session belongs to when you have multiple devices in use.
File upload
The More menu in the top-right corner of the page also includes a file upload section that allows you to transfer a file from your computer to the device and save it into one of several standard folders: Downloads, Documents, Pictures, Movies, Music or DCIM.
Selecting a destination folder opens your browser’s file picker; once you confirm the file, it is uploaded to the chosen folder on every connected device simultaneously. When all uploads succeed, a confirmation notification is shown; if the session includes multiple devices it also states how many devices received the file. If one or more uploads fail, the notification indicates how many devices were affected.
Adding other devices
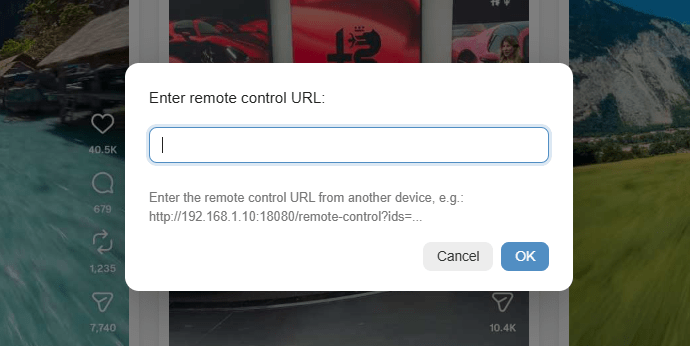
The remote control interface is not limited to clones running on a single device. You can add clones from one or more other devices to the same browser window using the Add another device option in the ⋮ menu. This makes it possible to view and interact with clones across multiple physical devices side by side and to use all features such as event mirroring and macro recording across all of them at once.
To add another device, open a remote control session on that device and copy its URL from the browser’s address bar. Then, in the session you want to merge it into, open the ⋮ menu and select Add another device. Paste the URL into the dialog and confirm. The clones from the other device are appended to the gallery immediately.
Both devices must be running the same version of App Cloner. If a version mismatch is detected when adding a device, an error message is shown and the device is not added.
Clones from different devices are displayed as separate groups within the gallery. A vertical line between groups visually distinguishes which clones belong to which device. Reordering clone cards is supported only within each device group; clones cannot be moved across device boundaries.
Once you have arranged the session to your liking, the URL in the browser’s address bar reflects the complete combined session, including all connected devices and the current clone order. You can copy, share or bookmark this URL to instantly restore the same multi-device layout in a single click.
It is recommended to use the same device type to keep aspect ratio and layout consistent across all devices, especially when using event mirroring or macros.
Adding other devices requires the Ultra+ edition of App Cloner and the Remote control extension.
Per-clone actions
Each clone card has a ⋮ button in its footer that provides actions specific to that individual clone. From this menu you can bring the clone to the foreground if it has been pushed to the background, restart the clone, and, if the clone was created with identity management enabled, generate a new identity or reset the clone’s identity to its original state.
You can change the order of clones by moving clone cards left or right and you can remove a clone from the current session. The URL in the address bar is updated accordingly, so you can copy, share or bookmark the link with the new order.
The Back button in each card’s footer sends the Android back action to that clone, equivalent to pressing the system back button on the device.
Fullscreen view
Clicking the fullscreen button on any clone card expands that clone’s screen to fill the browser viewport. In fullscreen mode you can interact with the clone exactly as you would in the gallery view, pointer events, keyboard input and scroll events all continue to work normally. Clicking anywhere outside the expanded image, pressing Escape or navigating back closes the fullscreen view and returns you to the gallery.
Event mirroring
Event mirroring is one of the most powerful capabilities of the Remote control feature. It allows every interaction you perform on a primary clone, e.g. taps, drags, scrolls and keystrokes to be simultaneously replicated to all other clones in the session, enabling you to control many clones as if they were one.
To enable mirroring, click the Link button (the chain-link icon) in the footer of the clone you want to use as your primary control. When a clone is linked, its Link button turns blue to indicate that it is the source of mirrored events. Any pointer or keyboard input you direct at the linked clone is forwarded not only to that clone but also to every other clone in the session that does not itself have the Link button active. Unlinked clones act as passive mirrors, receiving the same events as the primary clone and executing them in parallel.
This behavior makes event mirroring especially useful when you want to perform the same sequence of actions across multiple clones simultaneously, for example, navigating through identical on-boarding flows, entering the same data across several accounts or executing the same in-app actions on many clones at once. Because all clones receive the exact same pointer coordinates and key events at the same time, their screens stay in step with each other throughout the interaction.
Should you need to make individual adjustments, you can still control the unlinked clones, having the Link button disabled, individually.
To stop mirroring, click the Link button again on the primary clone to deactivate it. Events will then be sent only to whichever clone your pointer is hovering over, as in normal single-clone operation.
As a shortcut, you can also toggle event mirroring on or off for any clone by clicking the middle mouse button directly on its screen.
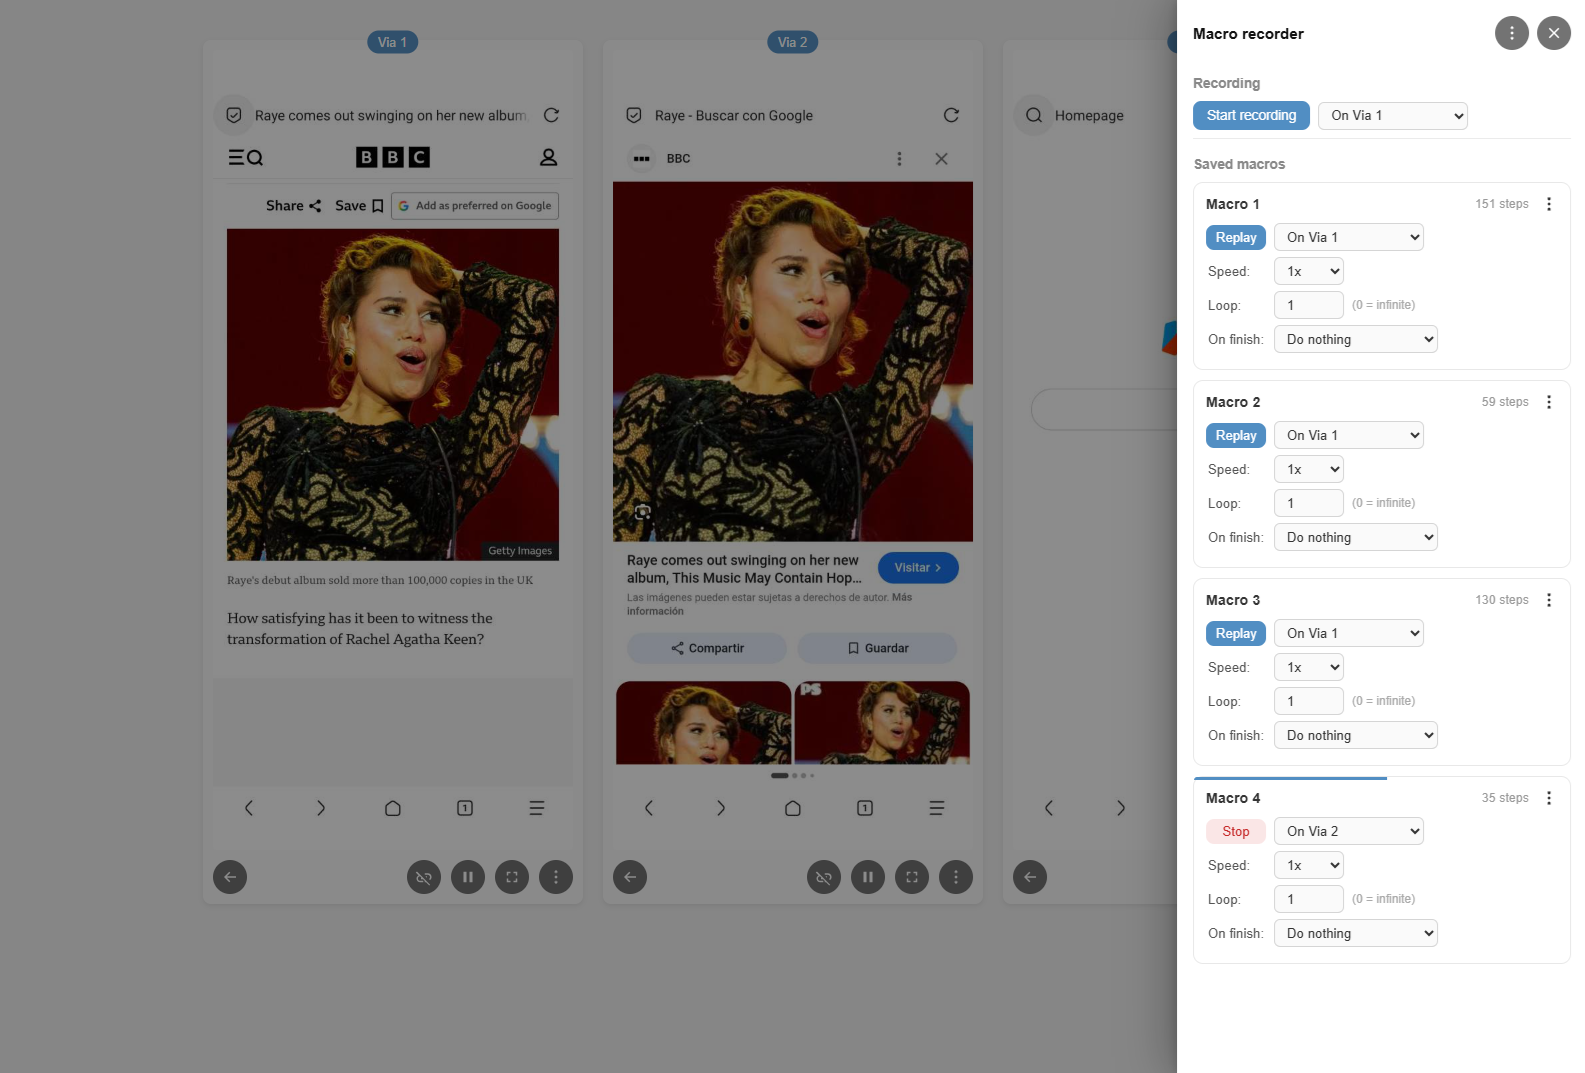
Macro recorder
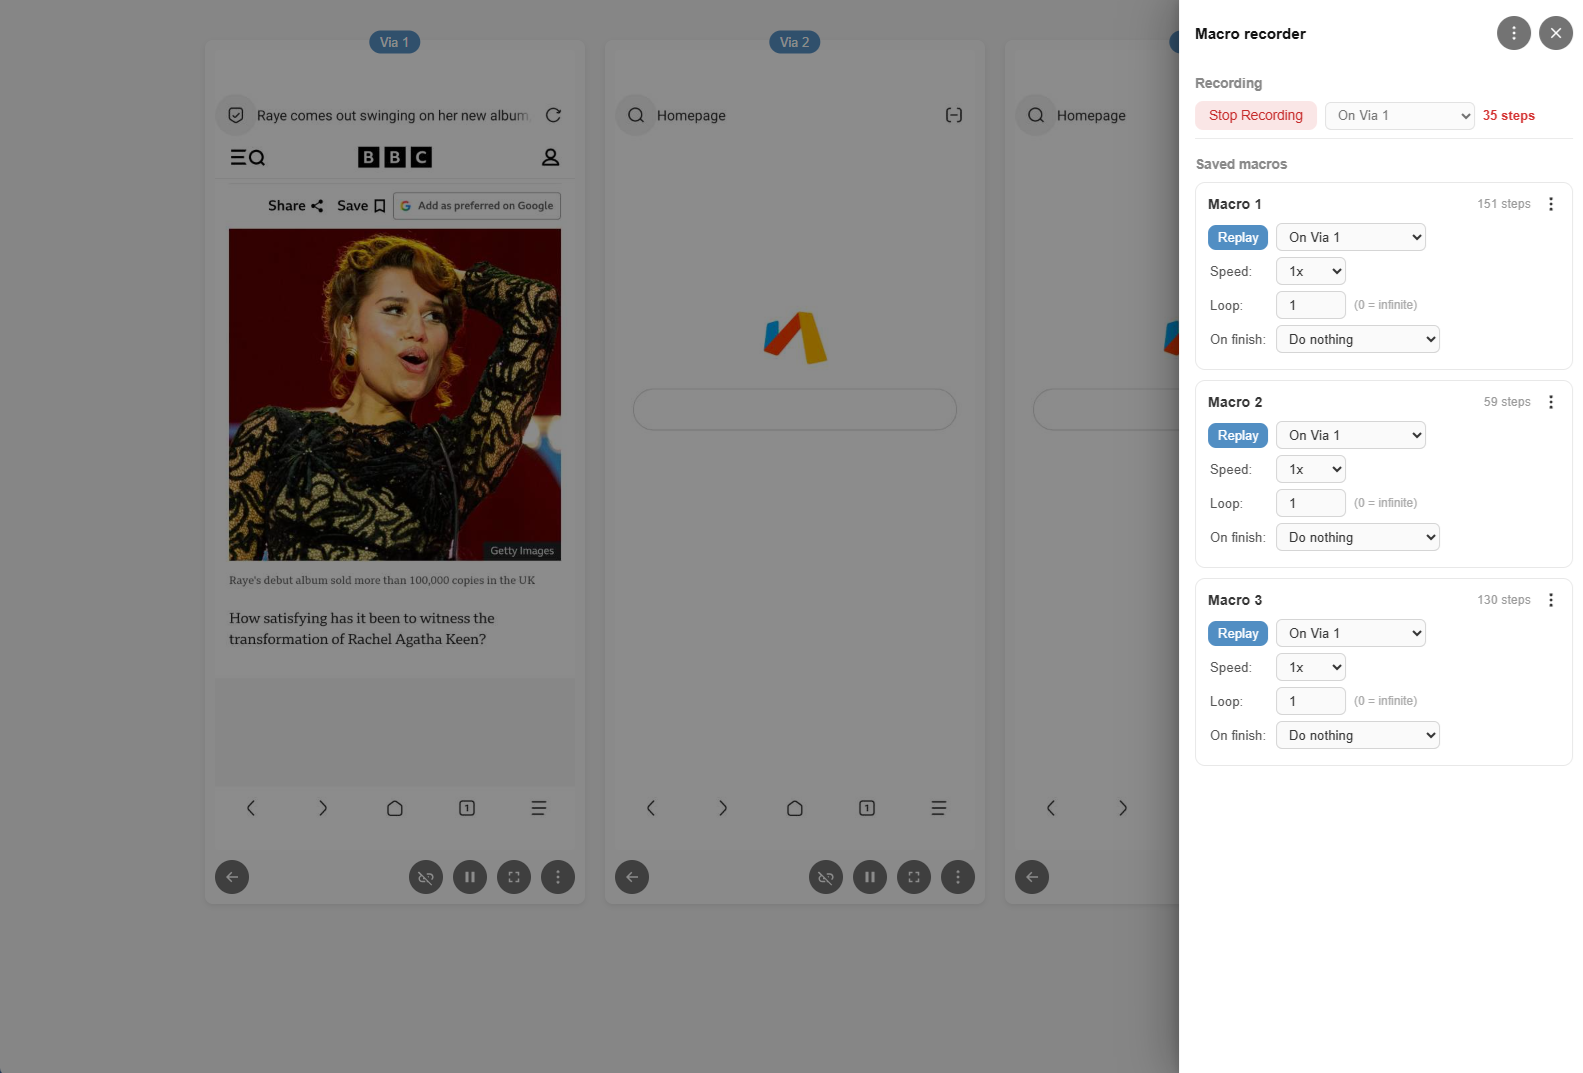
The Macro recorder lets you record a sequence of interactions once and replay them on any clone, at any speed, any number of times. Macros are stored in your browser’s storage and persist across sessions but they may also be exported and imported. To open the Macro recorder side panel, click the record icon in the top-right toolbar (next to the stream controls).
Recording a macro
- In the Recording section at the top of the panel, choose the clone to record on from the On <app name> drop-down.
- Click Start recording. The toolbar icon turns red and pulses to indicate an active recording session.
- Interact with the clone normally. Taps, swipes, scrolls, keyboard input, back gestures and clipboard pastes are all captured with their real timing gaps.
- Click Stop recording. If any steps were captured, you are prompted to name the macro. Cancelling the name dialog discards the recording.
Replaying another macro while recording is in progress does not pollute the recording as replayed events are intentionally excluded.
Managing macros
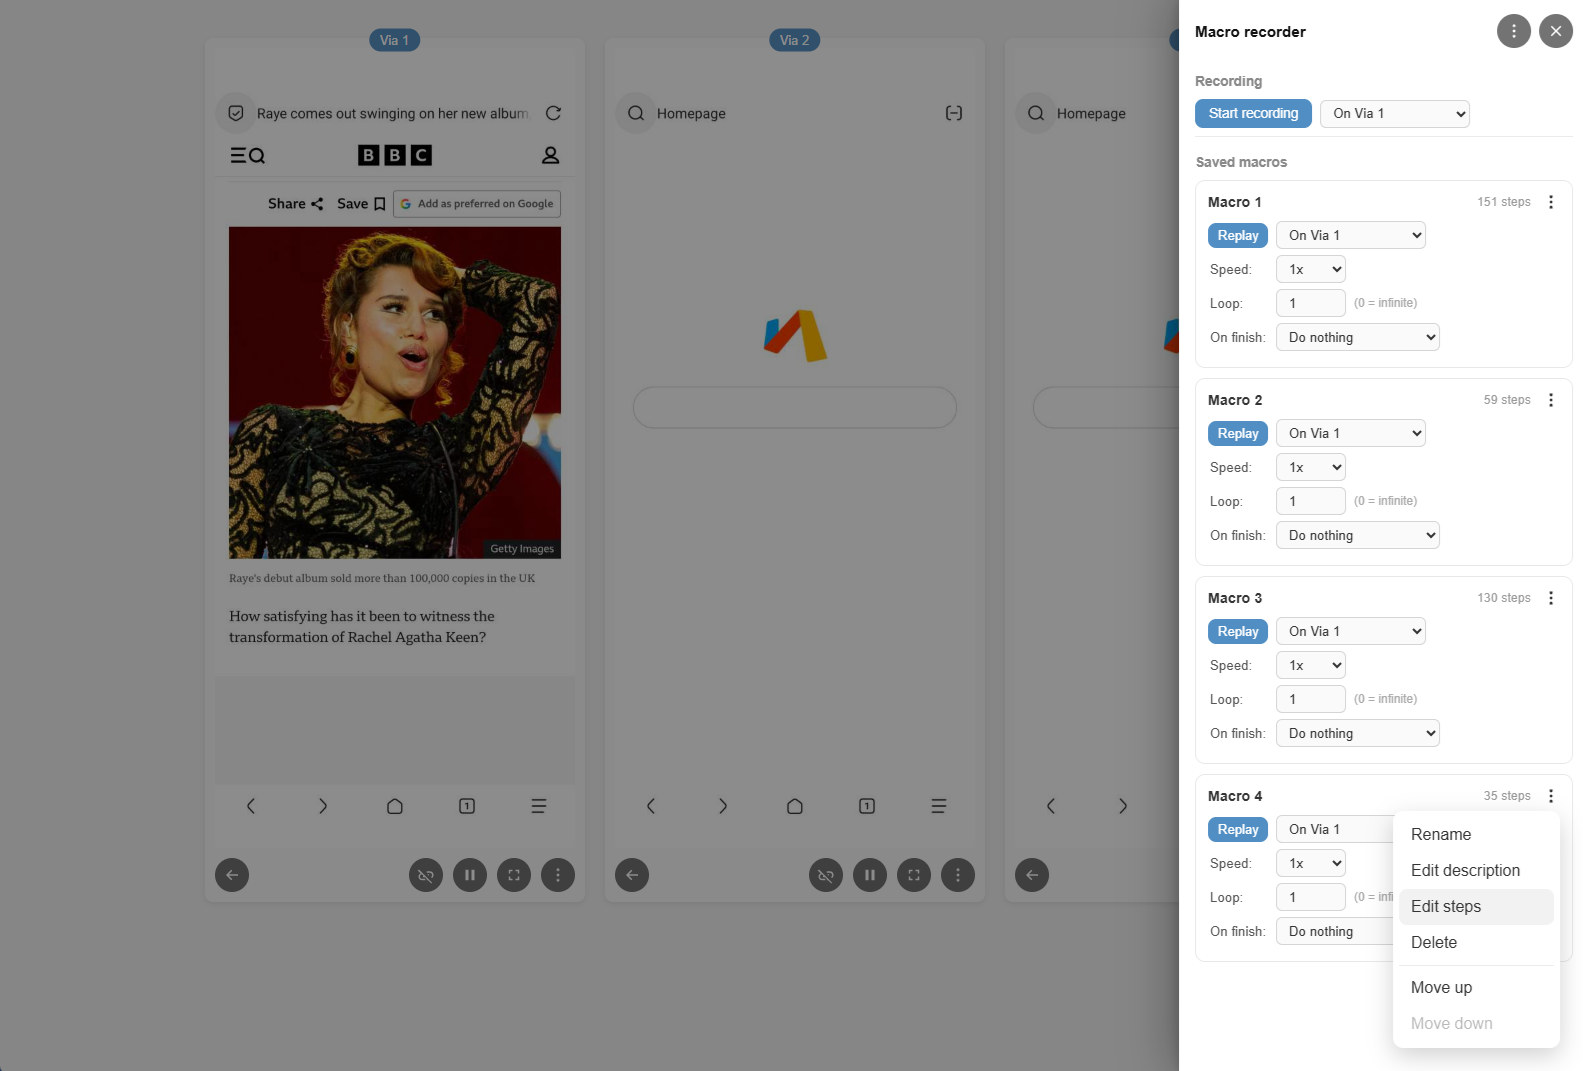
Each saved macro appears as a card in the Saved macros list. The ⋮ button on each card opens a menu with the following options:
- Rename
Change the macro name; prompts before overwriting an existing name. - Edit description
Add optional descriptive text shown below the macro title. Leave blank to remove it. - Edit steps
Open the step editor to review every captured event, adjust its pre-step delay in milliseconds or delete individual steps. - Delete
Removes the macro after confirmation.
To reorder macros, drag the ⠿ grip handle to the left of the ⋮ button and drop the macro at the desired position.
Replaying a macro
Each macro card has a Replay button and a target drop-down on the first row:
- On all clones
Sends events to every clone simultaneously. - On <app name>
Sends events to a specific clone. If that clone has event mirroring enabled, the replay automatically fans out to its linked secondaries as well.
The second row sets the Speed multiplier (between 0.25× and 5×), which scales all inter-step delays proportionally. The third row sets the Loop count, i.e. how many times to repeat the full sequence. Set to 0 for infinite looping.
While a replay is running the Replay button is replaced by a Stop button and a thin blue progress bar appears at the top of the macro card. The bar reflects true overall progress: for finite loops it tracks completion across all repetitions combined; for infinite loops it resets each pass to show within-loop progress. Clicking Stop halts playback immediately.
When the Loop count is set to 0 (infinite), a Duration row appears below the Loop row with hour and minute fields. Setting a duration automatically stops the replay after the specified time has elapsed. Leaving both fields at 00:00 means the replay continues indefinitely until you press Stop manually.
The On finish row at the bottom of each macro card controls what happens when a replay ends naturally, that is, when it has completed its loop count or exhausted its duration, rather than being stopped manually via the Stop button. Selecting Restart automatically restarts the clone once playback finishes. Selecting New identity triggers a new identity generation; this option is only shown when all selected target clones support identity management. The On finish row is hidden when the loop count is 0 and the duration is 00:00, since the replay has no defined end point in that configuration.
Step editor
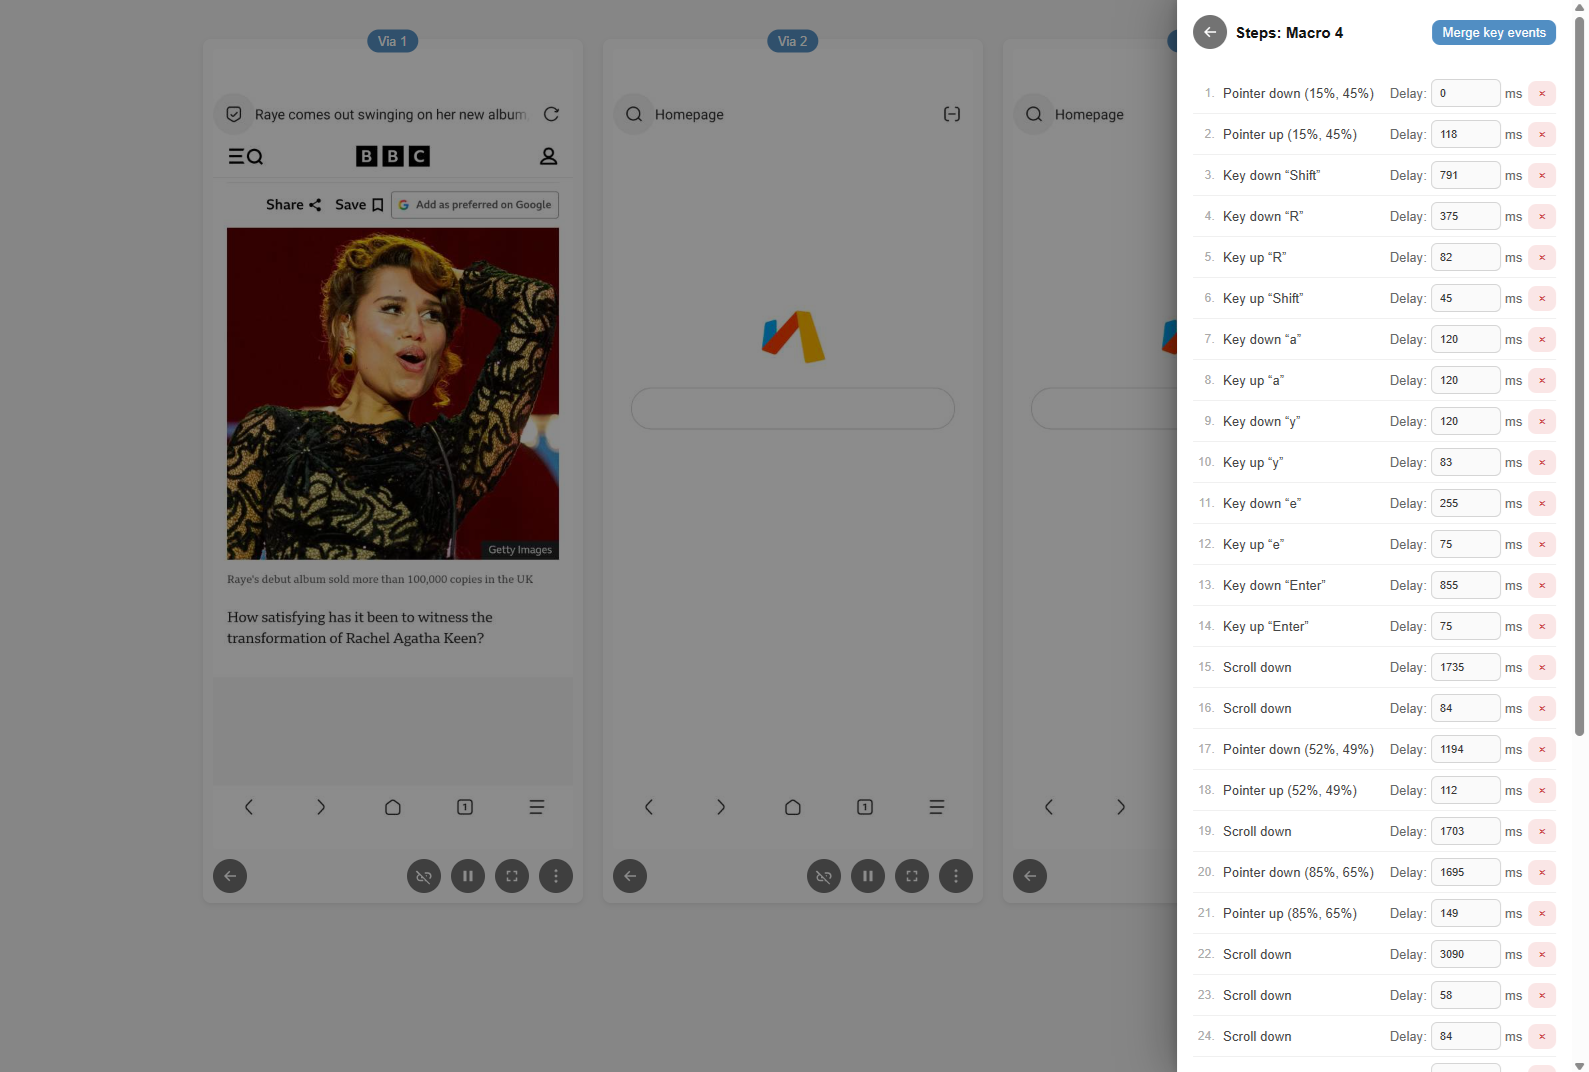
The step editor lists every recorded event in order, numbered sequentially. Each row shows the event type (e.g. Pointer down (42%, 71%), Key press “a”, Scroll up) and an editable Delay field representing the pause before that step fires. Delays are in milliseconds and can be set to 0 to remove any gap. Use the × button on the right of each row to delete a step. Changes are saved automatically.
If the recording contains consecutive keyboard events that together form typed text, a Merge key events button appears in the header of the step editor. Clicking it consolidates adjacent key-down and key-up event pairs for printable characters into compact Type steps. A Type step types its text character by character during replay, respecting the speed multiplier, and produces a much shorter and more readable step list for any macro that involved typing. Each merged Type step can be further edited directly in the step editor.
Type steps support variable placeholders in the form {variable}. During replay each placeholder is substituted with the value configured for the target clone in the Variables editor (see the Variables section below).
Since variables are defined per clone, the same macro can type different text into each clone simultaneously, which is useful for filling in login names, passwords, search terms or other clone-specific data. If a variable name is not found or has no value for a particular clone, the placeholder resolves to an empty string. To include a literal curly bracket rather than starting a placeholder, use the escape sequences \{ and \} (prefixed by a backslash).
Scheduling macros
The Scheduling section at the bottom of each macro card lets you configure a macro to run automatically on a recurring schedule. Scheduling is only available when the macro has a defined end point: either a finite Loop count or a duration set in the Duration row. When Loop is set to 0 and Duration is 00:00, the Scheduling section is hidden.
To enable scheduling, tick the Scheduling checkbox. A set of options appears beneath it.
The Run every row sets the interval. Enter a number and choose either minutes or hours from the adjacent drop-down. When the unit is set to hours, an additional At row appears below, letting you specify how many minutes past the hour boundary the macro should fire. For example, with an interval of 2 hours and At set to 15, the macro fires at 0:15, 2:15, 4:15 and so on.
A scheduled replay uses the same Speed, Loop, Duration and On finish settings as a manual replay. If a scheduled run fires while a target clone is already busy with a replay, that run is skipped and an error notification is shown. The timer re-arms immediately so the next scheduled run is not affected.
While a scheduled replay is in progress, a (Scheduled) badge appears next to the target drop-down on the macro card.
All scheduling settings are saved to your browser’s local storage and take effect immediately when changed. Note that for scheduling to remain active, the browser window or tab must remain open; closing it will stop all pending schedules. Make sure your browser does not suspend or pause background, inactive or unfocused tabs, as this can affect scheduling.
Variables
The Variables editor, accessible from the ⋮ menu in the Macro recorder panel header, lets you define named text values on a per-clone basis. These values are inserted into Type steps at replay time using placeholders (see the Step editor section above).
The editor opens as a dialog containing a table. The first column holds the variable name, which is the key used inside {…} placeholders in Type steps. The remaining columns correspond to each connected clone, headed by the clone’s display label. Enter the value that each clone should use for that variable in the appropriate cell.
To add a new variable, click Add variable at the bottom-left of the dialog. A blank row is appended; type the variable name in the first column and the per-clone values in the subsequent columns. To remove a variable, click the × button at the end of its row.
If a variable holds sensitive data such as a password or login credential, tick the Password checkbox in that row. This masks all per-clone value fields for that row so the values are not visible on screen.
Click OK to save all changes to your browser’s local storage. Click Cancel to discard any edits.
Export and import
The ⋮ button in the panel header provides two options:
- Export macros
Downloads all macros as a JSON file. The file includes names, descriptions, all steps with their delays and event payloads. The file also includes any variables defined in the Variables editor. - Import macros
Opens a file picker and merges the selected JSON into the current macro library. Existing macros with the same name are overwritten. Any variables included in the file are merged into the current variable set, with existing variable names being overwritten.
Use export / import to back up macros and / or share them between devices.
The Macro recorder requires the Ultra+ edition of App Cloner and the Remote control extension.
Troubleshooting
If your PC or desktop cannot connect to the Remote control URL, make sure both devices are on the same network and that neither device is using an always-on, blocking VPN connection. Also check that your Wi-Fi router does not use a firewall or other filtering mechanism that could block access to the Android device.
For the Remote control feature to work reliably, and to help prevent Android from terminating apps in the background, both App Cloner and the relevant clones must be granted the following permissions:
- Display over other apps
This permission may also be called Display popup windows. - Start in background
This permission may also be called Open new windows while running in the background.
The second permission is not available on all Android devices. If your device does not provide it, granting the first permission is usually sufficient. App Cloner will notify you if these permissions have not been granted correctly.
The Remote control interface will display an error message if there is a communication problem with the cloned app or if the app has not been started. An audible alert will also be played when an error is detected.
If clones are still being terminated in the background, make sure App Cloner and the affected clones are excluded from battery optimization. You can also clone the app with the Request ignore battery optimizations option enabled. If needed, you may additionally try the Persistent app option.
The number of apps your device can keep running in the background at the same time depends largely on the amount of available RAM. Devices with at least 12 GB of RAM are recommended, although actual performance will also depend on the specific apps being used.
When using Remote control together with the Wireless debugging installation method, all required permissions are granted automatically: Display over other apps, Start in background, unrestricted battery usage, etc.
On older Android versions, video playback, live video feeds and other hardware-accelerated content may not appear correctly in the remote view because of Android screen capture limitations.
If you have issues with keyboard input, make sure each remote-controlled app has been brought to the foreground and has been fully displayed at least once after starting.
Remote control automatically enables the Prevent app from pausing option but an app only becomes fully operational after it has been shown on screen once. When using Show all apps, Restart all apps, New identity or Reset identity with multiple clones, App Cloner waits between each app for the delay you configured in the dialog. If apps are not responding correctly to remote control after a bulk action, increase the delay so each clone has enough time to fully show its user interface. You can also bring each app to the foreground individually using the Show app option in the per-clone ⋮ menu.
If Android shows a dialog saying the app was built for an older Android version, this can also take focus away when the clone moves to the background. This usually happens the first time a clone is started or after generating a new identity, since that clears the app data. Because this is a system dialog, it cannot be dismissed remotely. You will need to clear the dialog manually or you can also use the Wireless debugging installation method to bypass this popup.
Demo video
MCP Server
App Cloner also offers an MCP server, allowing AI assistants such as Claude to connect and control your clones directly, without any extra software or scripting. For details please see Remote Control MCP Server.

You must be logged in to post a comment.